
The start of the Gallipoli Campaign
Just six months into World War I, casualties were already sky high. British soldiers were falling by the tens of the thousands on the Western Front and leading politicians began looking for an alternative to the slaughter in the trenches.
Most vocal among them were Lord Kitchener, Secretary of State for War, and Winston Churchill, First Lord of the Admiralty, who thought that instead of trying to beat the Germans in Flanders, they should strike towards the weakest link of the Central Powers – the Ottoman Empire.
They believed the Ottoman military to be second rate, more of a nuisance than an equal. Churchill envisioned a strike against Constantinople itself by sea. Taking the Turkish capital would drive the Ottomans out of the war and open up a direct shipping route towards their Russian ally. Indirectly, it would safeguard British interests in Mesopotamia and Suez, so on paper, this seemed like a win-win for the Allies.
A major reason for the British hubris was the recent military record of the Ottoman Empire. Serious defeats during the Balkan Wars and the recent catastrophic outcome of the Battle of Sarikamish just weeks prior, where tens of thousands of soldiers froze to death in the Caucasus mountains, painted a picture of incompetent leaders and a badly equipped and trained Ottoman military. The “Sick man at the Bosporus” would be no match for the professional British soldiers.
There was, however, a major obstacle. To strike against Constantinople, the Allied fleet would have to penetrate the straits of the Dardanelles that guard the entrance to the Sea of Marmara, and those straits were narrow and had been a natural line of defence for centuries.
Meanwhile, the “sick man” was not as sick as the British believed. Since the Balkan Wars, the defences of the straits had been continually improved and ammunition restocked. In addition to long range guns, the Ottomans had mobile 120mm howitzer batteries at the ready, highly trained troops, and line after line of mines in the waters. Under Canakkale Fortified Area Command of General Fahri Pasha, the Dardanelles became the most fortified area of the whole Ottoman Empire.
The British and French fleets tried to force passage through the straits. Even a modern warship can be sunk by a single mine, though, and after disaster on March 18, 1915, when the Ottomans sank three Allied battleships and severely damaged three more, the Allies had to re-think: the artillery positions on the hills had to be taken out first by land if the operation towards Constantinople was to succeed.
That task was given to General Sir Ian Hamilton, in overall command of the Mediterranean Expeditionary Force. The MEF included, along with British units, the ANZAC – Australian and New Zealand Army Corps – under General Sir William Birdwood. ANZAC had been heading for Britain before being diverted to Egypt. Instead of fighting Germans, they would now fight the Ottomans. The Australians, New Zealanders and Maoris of ANZAC considered themselves natural soldiers, men hardened by daily outdoor activity, and the aggressive and unruly character of the ANZACs seemed perfect for the task ahead. The MEF was further strengthened by an Indian Brigade and the Gurkha Rifles, who joined the ANZACs and a French force in Malta in early March. The French government was not too keen on the whole endeavour, but they themselves had their own ambitions in the Middle East and could not simply leave it all to the British if they succeeded in toppling the Ottomans. They created the 1st Division Corps Expéditionnaire d`Orient, made up off regular French troops, the French Foreign Legion and Senegalese and Zouave forces.
Once again, though, the planning phase betrayed the arrogance of British High Command. While Generals on the Western and Eastern fronts made plans for all sorts of eventualities and for a quick exit if everything went to hell, nothing of the sort was prepared for the Gallipoli landings. Instead, Hamilton’s plan was overambitious and had one critical flaw: it all depended on the Ottomans inability to stand up to the invaders. But what if they didn’t turn and run and instead stood and fought?
The German influence over the Ottoman forces was personified by General Otto Liman von Sanders, who was in command of the 5th army at Gallipoli. Ever since the naval attacks, it was thought that an invasion might take place and the British did little to hide their intentions. In fact, the Greek newspapers ran headlines about the coming landings. But the Gallipoli Peninsula was large, and the Ottoman forces could not guard every beach.
Von Sanders decided to put only a screening force as a trip wire defence close to the beaches and keep most of his men in reserve units further back. Ottoman officers at the front would assess the situation and send in reinforcements where necessary. One such officer was Lieutenant Colonel Mustafa Kemal, in command of the Ottoman 19th Division. He was familiar with the defences and his troops were well trained, motivated and equipped. In fact, with the help of German instructors and weapon supplies, it was quite a formidable fighting force.
The landings began the night of April 25. The ANZACs would land on the west of the Peninsula at place called Gaba Tepe, later known as ANZAC Cove. They would build a bridgehead and advance the next day all the way to the heights of Mal Tepe. The other British troops would land at the tip of the Peninsula, Cape Helles, and then take Achi Baba and the Kilid Bahr Plateau in one fell swoop. After that they would simply join forces and push the Ottomans from the heights. There were also several diversionary landings around the flanks, with the French landing on the Asian side of the Straits at Kum Kale.
And so it begins…
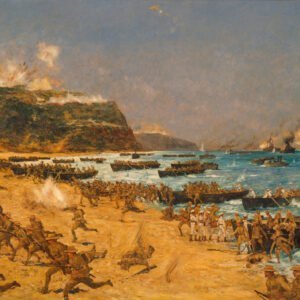
Illuminated by the moon, the ANZAC landing craft made their way towards their destination, fighting the strong currents. The beaches were engulfed in darkness, all was still and hopes were high that they would fully surprise the enemy. But as soon as they reached the land, the first bullets crashed into the boats. A concert of rapid rifle fire erupted, and the Battle for Gallipoli had begun.
ANZAC was not even facing an entire battalion, but the sudden fire caused confusion, as the first casualties began to litter the beaches. As more and more ANZACs landed, the outnumbered Ottomans retreated to higher ground and into prepared trenches, and as the sun rose, they fired freely into the mass of men on the beaches.
The ANZACs had been ordered not to load their rifles and instead rushed up the hills, bayonets fixed. But in the dim morning it was hard to navigate the steep heights and the thorny undergrowth, and the Ottomans fired and retreated further. The ANZACs were soon left out in the open, trying to make sense of the rough terrain. Climbing the high ridges, running through razor sharp thorns and slippery stones soon left the men exhausted, and many fell to accurate Ottoman sniper fire. The maps were totally inadequate and the officers still standing were overwhelmed by the situation. The Ottomans themselves retreated towards the heights of Chunuk Bair. From the high ground they could direct artillery fire onto the beaches.
“I don’t order you to attack – I order you to die.”
was among the first to understand that the landings at Anzac Cove were not a diversion, but the real deal. He ordered his Division to Sari Bair, the highest point on the Peninsula, but while he himself was trying to get a better view of the situation, he saw exhausted men flooding back from the fighting. Upon ordering them to stop, they declared that the ANZACs were moving up and they themselves had no ammunition left. While Kemal’s orderlies were running back to get the division moving, he ordered the men he’d halted to fix their bayonets and turn back to attack with the now famous words: “I don’t order you to attack – I order you to die. In the time which passes until we die, other troops and commanders can take our place.”
The pursuing ANZACs were totally caught off guard by the sudden counterattack. Fearing that Ottoman reserves had already arrived, they pulled back. Everywhere around Anzac Cove, the Ottoman resistance began to stiffen. Attempts to cross the ridges were immediately met with heavy fire from an unseen enemy. The invaders were stuck.
At Helles, the situation was even worse. This was an obvious landing site and the Ottoman defenders had prepared thoroughly. As the Allied landing craft closed in on the beaches, they were met with a deadly hail of bullets. Many men were hit before they could make landing, others panicked and jumped into the water. Many of those drowned, dragged down by their heavy kit. But those that made it out of the boats met belts of barbed wire guarding the beach, trapping them in the open. Soon, bodies littered the beach and the waves washed ashore blood red. The men lucky enough to make it through, huddled down behind a sandbank. At just 5 feet high, around 1.5m, it was the only cover available.
Again, there were only a few Ottoman platoons defending the area, but they had fortified trenches and knew how to use their rifles and field artillery to deadly effect. The British officers could only watch as the landing crafts were blown to pieces. The men at Helles were trapped.
Similar scenes happened at the other landing places. Y Beach was shot to pieces, while the attacks on X and S broke down the same way as the main landings without major results.
Often forgotten by the history books is the French landing at Kum Kale, the only ‘sort of’ victory that day. That force under General Albert d’Amada was to silence the Ottoman guns on the Asian side of the Straits and divert Ottoman troops. Their actual landing was nearly unopposed, but the overall Ottoman forces facing them were far more numerous than on the European side. Fighting for the tiny town lasted all day, but the vicious close quarter combat was for naught. The invasion plan had failed.
A failed invasion plan
And as darkness fell, it came as a relief. For the exhausted Ottomans, it was time to fall back and reorganise, and wait for the reserves. For the Allies, the cover of night was a saving grace. Finally, they could make a move. Men could come ashore, the injured could be tended to and fresh officers could take charge. The wounded flooded back to the medical ships, but the doctors and nurses were not prepared for the amount of casualties. There was not enough room and not enough morphine, and even if a wounded man survived, it was still a journey of 600 miles back to Alexandria to recuperate.
The first day of Gallipoli came to an end, but the campaign had only just begun.
If you prefer a visual representation of this story, watch our Sabaton History episode: Cliffs of Gallipoli Part 1 – The Great War
The story continues…
Hot on the heels of the Gallipoli landings, which were considered both a tactical and strategic failure, the Allied troops held onto their beachheads and managed to conquer a few ridges and hills around the landing sites, but that was nothing compared to the objectives set for them.
 The invasion plans were far too ambitious and were based on the belief that the Ottomans would be easy to defeat. By May, the Allies should have cleared the whole Peninsula. Instead, the Ottomans had the advantage and they brought in reinforcements, machine guns and howitzers, while fortifying the higher ground. German General Liman von Sanders had had time to read the reports of his Turkish officers and commit his reserves, and although their localised counterattacks were stopped by the invaders, it was clear that they would not just sit and remain passive forever.
On the night of May 19, the Ottomans gathered a large force of fresh reinforcements from Constantinople and Smyrna under Essad Pasha. Thousands of cheerful young men, praying for God’s help, went over the top towards the enemy. But the ANZACs facing them had been well aware of the build up to the attack. As daylight broke, 10,000 casualties littered the narrow fields of no-man’s land, piled up on top of each other. Like everywhere in this war, the firepower of entrenched machine guns and determined riflemen had created an impassable wall. And the Ottomans learned a lesson by blood, never again would they try to attack on such a large scale, and instead, would focus on smaller skirmishes, raids and their relentless snipers.
Soon, the stench of rotting flesh in the summer heat was too much to bear. A short armistice was arranged, and men from both sides went onto the battlefield to bury the dead. It was the first time here that the men came to know each other without violence. Curious looks and even small gifts were exchanged.
Trench warfare
Trench warfare set in on the Gallipoli Peninsula, and soldiers on both sides realised that they were going to be there for a while. To escape the constant threat of shells and sniper fire, men began to disappear under the earth, into trenches and dugouts. The Peninsula was soon transformed into a maze of trenches, saps and strong points, zigzagging through the rough countryside. Both sides mined and countermined each other, while on the surface, skirmishes were fought all the time over the narrow plateaus, steep ridges and hilltops. Places like “Dead Man’s Ridge”, “Battleship Hill” or “Lone Pine” were constantly contested, and yet, at Anzac Cove, the men found ways to communicate with the enemy. No one wanted to die needlessly, so sometimes instead of bombs, they might throw a pack of cigarettes over the parapets or toss across a can of bully beef.
The French on the far right at Helles had similar “live and let live” arrangements with their enemies. For example, if both sides had to cross a certain gully to bring in fresh water, they would plant little flags or signposts, and as long as no one ventured further than that, they would not be shot at. In the British sector of Helles, though, there was no such fraternisation. Ottoman high command loathed the British imperialists and thought them to be the major aggressor in this war. Both sides fired at the slightest sign of movement, harassed each other day and night with artillery, and gave no quarter during advances.
The overall situation at Gallipoli barely changed over the summer. The Allies needed more men and artillery to achieve anything bigger than taking the next ridge before them and the Ottomans had all the time in the world to strengthen their defences. Here and there, brave attacks and successful bluffs continued to improve the Allied positions, but they did not change the overall stalemate. And larger assaults led to massacres and huge casualties on both sides.
While the Ottomans were defending their homeland against foreign invaders, the sense of the whole point of the campaign began to be lost among the Allies. Clearly, they were not winning this battle, and clearly, they were not advancing towards Constantinople. They could not even advance towards the next ridge without losing friends and comrades. The dehydration due to the constant lack of water, which they had to import from across the sea; the ever-present sniper fire; the flies; the lice; the fever; the dysentery made morale plummet, as did the health of the soldiers. Life at Gallipoli was never safe. Bullets and shells could be avoided, but it was harder to avoid illness or exhaustion.
High command was aware of the lack of progress. British Secretary of State for War Lord Kitchener feared the loss of British prestige in the Islamic World if they retreated. Such a retreat might also encourage other nations to join the Central Powers. But, you know, the common soldiers cared little for such concerns.
August 1915
Things were supposed to change in August. A new landing at Suvla Bay would open up the possibility of a left hook, and in concert with a breakout attempt at Anzac Cove, would disrupt the Ottoman hold over the Peninsula and finally open up a way to the Sari Bair ridge.
Diversions for the landing at Suvla took place all over the Peninsula, but though there was still a lot of fight left in the exhausted ANZAC troops, the plans of High command were simply out of range of what was physically possible. And the landings at Suvla Bay faced the same problems as the landings on day one. Under fire and in unmapped territory, the men quickly lost trace of time and space, and although they advanced quite a bit inland, they were soon checked by determined Ottoman reserves and had to dig in. They did not meet any of their objectives. The August battles brought no major changes to the overall situation.
Nothing short of total disaster
A fatalistic mood set over the Allied forces. In September and October, men and guns were further worn out and the weather began to change. The heat and the flies vanished, sure, but the approaching winter was even more threatening. The thought of evacuation began making the rounds.
By October 14th, General Sir Ian Hamilton, in charge since the beginning, was dismissed, and General Sir Charles Monro took his place. Monro had a more realistic approach than Hamilton. By the end of October, he had visited all three landing sites and came to the conclusion that the whole campaign was nothing short of total disaster. The Ottomans still occupied the dominating heights and the overall lack of sufficient artillery and supplies would not challenge that. He telegraphed his opinions back to Kitchener, but Kitchener didn’t believe him and went to see for himself. By the end of November, the War Committee had approved the evacuation.
This was easier said than done. Immediate evacuation would result in a massacre if the Ottomans caught them halfway through. But with winter approaching, they could not wait for long. Heavy rain poured in from the heights down into the trenches, cold winds from the sea hit the exposed troops and frostbite grew rampant. Although the Ottoman soldiers were in the same boat, they had a short supply chain bolstered by gifts of winter clothing from the people of Constantinople.
A masterpiece in planning and execution
The only real option was to evacuate without the Ottomans realising. The plan was that they would lull the Ottomans by reducing activities to a minimum. The ANZACs and the 80,000 men at Suvla Bay were first. As they stopped responding to the enemy’s shelling, the Ottomans came forward, but were met with rifle fire. As this was repeated, the Ottomans got used to the silence. Over weeks the lines were gradually thinned out, until only a screening force remained. Sappers began booby trapping the trenches, supply stores and dugouts with tripwire explosives. On the night of December 18, the final evacuation began. The Ottomans suspected nothing, and in fact, were only alerted by the fire and explosions as the last men set the fuses.
The evacuation was a masterpiece in planning and execution, but what about Helles? Now that the Ottomans knew what was up, could they be fooled again? By diverse patterns of counter-fire and periods of silence, they gave the Ottomans a false sense of activity, until January 8, when the evacuation of Helles finally began.
The last men in the trenches were almost crazy with nerves, because if the Ottoman had sniffed out their little trick, they could have easily overrun the beaches. The night remained silent. Everything that could not be brought away was booby trapped or destroyed. It was not until the last British soldiers had left the beaches that the first Ottoman patrols caught wind of the retreat. The evacuations were a complete success.
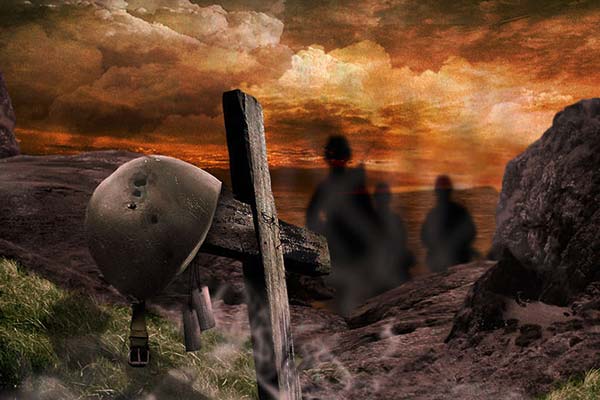
The Gallipoli campaign was a long and controversial attempt to reach and occupy Constantinople (now known as Istanbul) during World War I. The doomed campaign resulted in 213,000 casualties and cost 44,000 allied troops their lives.
More than a quarter of the deaths were Australians and New Zealanders. For the ANZACs, the fight for Gallipoli grew into a part of their national identity. It represented their baptism of fire and the beginning of a unique legacy separate from the British Empire.
Gallipoli was the Ottomans’ only major victory of the whole war, but it came at great cost – with an estimated 250,000 Turkish and Arab casualties. In modern Turkey, the campaign is viewed as a final patriotic defence of the land in the dying days of the Ottoman Empire.
After the eventual Allied victory in The Great War, the Empire was dissolved, and Gallipoli commander, Colonel Mustafa Kemal, went on to play the starring role in the events that followed – establishing the Turkish Republic and becoming its first president under the name Kemal Atatürk. He carried out huge reforms and modernisation in the country until his death in 1938.
Commenting on the Gallipoli Campaign, Mustafa Kemal Ataturk said: “Those heroes that shed their blood and lost their lives. You are now lying in the soil of a friendly country. Therefore rest in peace. There is no difference between the Johnnies and the Mehmets to us where they lie side by side here in this country of ours. You, the mothers who sent their sons from faraway countries, wipe away your tears; your sons are now lying in our bosom and are in peace. After having lost their lives on this land they have become our sons as well.”
The story of The Gallipoli Campaign truly impacted us as a band and heavily inspired our song ‘The Cliffs of Gallipoli‘ which is featured on The Art of War album. Take a look at the lyrics we wrote here.
If you prefer a visual representation of this story, watch our Sabaton History episode: Cliffs of Gallipoli Part 2 – The Great War


.jpg)